Tuesday, May 15, 2018

Spellbinders | Monthly Club Kits | May Card Kit 2018


May 2018 Card Kit of the Month

The May 2018 Card Kit of the Month from Spellbinders is available and is chock-a-block full of crafting goodness!  Each kit contains everything you need to create 10 lovely cards.  Spellbinders -  ready to create when you are!

THIS KIT INCLUDES:

10 cards & 10 envelopes; 10 sheets of 8.25 x 11" paper/cardstock; Set of 6 dies; Ribbons; Tags, Gemstones/Sequins;  Felted die cut circle; Flowers & Embellishments; Sentiment Stickers; Roll of double-sided adhesive; and 12 foam squares.   Virtually everything you need to craft all month long!

ADDITIONAL CARD INSPIRATION:

I have a number of cards to show you today.  So let's get started!   I cut the embroidery hoop from gold mirrored paper and placed it on top of one of the patterned paper folk art images - look at the dimension that provided!   Using the large bloom die that comes with the kit, I cut out several flowers and leaves using colored cardstock also provided in the kit, and placed them around the hoop.  I chose a sentiment and backed it with dimensional adhesive. Blue gemstones and a golden butterfly cut using another die in the kit finish the card.  So simple, so pretty!


From Folk Art designs to Birthdays and Weddings, the Spellbinders May 2018 Card Kit contains enough card crafting supplies for all the important events this spring - even a simple Hello!  


I was able to put together wide stripes and add sentiments with no problems - because no stamping is necessary (unless you'd like to add some of your old time favorites).   And honestly, I just couldn't resist that beautiful gold mirrored paper!  Ooh la la!!


Creating on the angle with the gorgeous colored cardstock and strips of mirrored gold paper was easy-peasy - what a dream!  And don't you love the faux wood ephemera?  The sheet of sentiments has something for every occasion.


There are two dies in this card kit that I love - One is an embroidery hoop, and the other is a nice round circle die that nests inside.  I found the small circle die perfectly cuts out one of the Folk Art images from the patterned pattern.  I've cut one to show you how easy it was to create the look of embroidery within the hoop.  I added some flowers that I sponged with ink, some pretty sequins, a strip of mirrored gold paper and those cute sentiment tickets - pretty awesome in my book!  Wouldn't this card be lovely for St. Patricks Day?!


Weddings and Anniversaries are on my mind.  We have a 50th Golden Wedding Anniversary coming up in October!  Where has the time gone?   I am married to an amazing man - generous, kind, and fair.   A man of true character, and we couldn't be happier together!


My last card is a clean and simple, vibrant and beautiful card using the embroidery hoop again as a base and cutting enough blooms in all the colors of the May 2018 Card Kit.  The golden butterfly perches on the blooms for a quick stop to smell the flowers.   Some gemstones and a sentiment finish the card.   The Spellbinders May 2018 Card Kit - We love to see you smile!

Interested in becoming a member of the Die of the Month, Large Die of the Month & Card Kit of the Month clubs?   Check out our Kit & Caboodle Membership


Thank you for your visit and until next time
Sincerely,
Susie ~

Wednesday, April 18, 2018

Spellbinders | Little Loves Collections | April 18th 2018 Blog Hop + Giveaway

Spellbinders | Little Loves Collections | April 18th 2018 Release Blog Hop + Giveaway

Hello friends!

What a pleasure to be back for my second Hop with Spellbinders as they feature their newest April release of the Little Loves Collection by Sharyn Sowell.   Sharyn is an awarding winning designer whose talents run the spectrum of the paper arts industry.   Her beautiful hand cut silhouettes in the Little Loves Collection range from infant to early childhood in the sweetest of poses.  Each die in this collection is beautifully etched to keep the integrity of Sharyn's hand-cut designs.

CARD DETAILS:
I wanted to create designs with a playful retro look, so I chose patterned papers to achieve the effect.  Did you know that little ones actually prefer primary color rather than pastels?  

Baby's Playtime (Little Loves Collection)
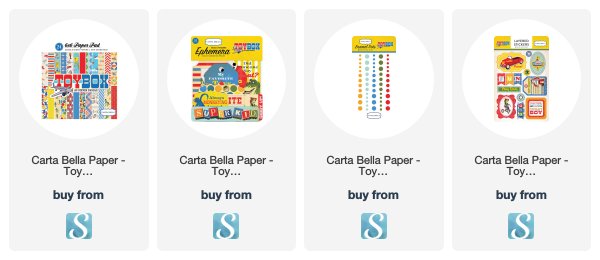
My first card, uses Baby's Playtime Etched die S4-893 and patterned paper and ephemera from Crate Paper and Carta Bella, Toybox.  I must confess that I have had the Crate Paper line for a long time, waiting for just the right time to use it (she smiles).  When I can, I try to find a little image(s) in the paper that would make a cute embellishment(s) - like the little airplanes and tug boat.   I fussy cut and pop them up with dimensional dots.   Because of the approximate size of this beautiful die (6.20 x 2.04) and because I wanted to keep the card to an A2 size, I sniped the last two babies off the silhouette.  I will use them for another card at a later date.
First Friends (Little Loves Collection)
First Friends Etched die S2-295 provides a peek into the world of little ones as they play next to one another.  Blocks, trucks, dolls, balls, and toys pulled with string all help little ones begin to socialize with one another.   It looks like a playdate in this happy neighborhood!
Me and Teddy (Little Loves Collection)
Me and Teddy S3-334 is especially meaningful to me since our little grandson is named Teddy.  Little images, buttons, adhesive enamel dots, and Nested Lacey Pennants S5-029 all surround this little boy as he shares his breakfast with his favorite friend.

Baby's Birthday (Little Loves Collection)

And before we know it we are celebrating birthdays 1, 2 and 3!  Baby's Birthday Etched die S4-892 reminds us of a time we cherish and hold dear.  I off-set the silhouette using some yellow polka-dot patterned paper over some dark blue for a nice contrast.  I hope you've enjoyed my sweet offerings as much as I have enjoyed creating them for you. 

Next up on the Hop isVirginia Lu  

GIVEAWAY:

To celebrate this month's release, Spellbinders is giving away a $50 gift certificate to a lucky winner.  Please leave a comment on the Spellbinders blog by Sunday, April 22nd 11:59pm EDT for a chance to win.  The winner will be announced in the blog hop post on Spellbinders blog the following day.  Winner is responsible for shipping cost, duties, and taxes.

OPTIONAL GIVEAWAY:

In addition,  I will draw a winner to receive a $25 gift certificate to Spellbinders.   To be entered, just leave me a comment on this post.   I will announce the winner on Wednesday, April 25th and provide information to collect the gift certificate at that time.   *Winner will be responsible for shipping costs, duties, and taxes.*

The Winner Is
Leslie Miller

Please contact Spellbinders at the following email address: socialmedia@spellbinders.us by May 8th, 2018 with the subject line Spellbinders April 2018 Blog Hop Winner from Susie's Blog  Please remember the winner is responsible for all shipping costs, duties and taxes.

Congratulations Leslie!  I've emailed you with details, please check your spam/junk folder if you don't see it.   Thank you to everyone for joining in with the hop and leaving comments.


SPELLBINDER SUPPLIES:


OTHER SUPPLIES:


KEEP HOPPING:  If you get lost along the way here's the entire hop list


Thank you so much for your visit today.  Enjoy the Hop!
Sincerely,
Susie ~
Wednesday, March 14, 2018

Spellbinders | Sew Sweet Collection Inspiration | Release Blog Hop + Giveaway

Spellbinders | Sew Sweet Collection Inspiration | March 14th Release Blog Hop + Giveaway

Hello friends!  Today I'm delighted to announce that I'm taking part in my first Spellbinders Inspiration & Release Blog Hop showcasing the Sew Sweet Collection by Tammy Tutterow.   This stamp and die collection features Tammy's love of everything handmade.  There are endless possibilities with this stamp and die collection so let's get started. 
Spellbinders Sew Sweet Collection Inspiration | Mini Book
CARD DETAILS:

When creating I like to represent the interests and style of the designer.   I decided to step back in time to my crafting beginnings with a little mini book.  This charming book features papercrafting, stamping, ribbons, and fabric crafts.  I've also added some of my own photographs, and a sample of my Copic coloring.  Something for everyone!

PAGE BY PAGE:

Spellbinders Sew Sweet Collections | Page 1 Close up
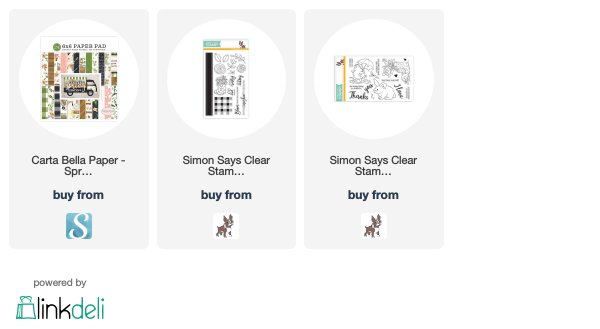
The sweet bird house, little blue bird, and flowers are all cut from the Sweet Tweets Collection in felt and layered on the Carta Bella Spring Market paper collection.  I've even added my sentiment from the ephemera line of the same collection.
Spellbinders Sew Sweet Collection | Page 2
Page two of the mini book has a 3x3 tri-fold decorated with a felted floral arrangement from the Sew Sweet Sentiments and Sweet Tweets sets both from the Sew Sweet Collection.

Spellbinders Sew Sweet Collection | Page 2 Close up
The tri-fold opens up to include three, 3x3 panels for photo's, stamped images, or sentiments of your choosing.  
Spellbinders Sew Sweet Collection | Page 3
Page three is designed with a pocket to hold a package of seeds, gardening notes, or plant tags.   You can personalize your mini book according to your style and theme.   Little french knots fill the centers of felted flowers and stitching decorates From Heart and Hand.   I've tucked a packet of mixed flower seeds inside the pocket - a perfect garden gift.
Spellbinders Sew Sweet Collection | Page 4
Page four continues with my garden theme.  What is more relaxing in spring than curling up with a good book under a blossoming tree with a gentle breeze blowing?
Spellbinders Sew Sweet Collection | Page 5
Scalloped or whimsy, there is a heart just right for your creation.  And if that isn't enough, a tag is included too.  The Heart and Hand Collection is a lovely set to use for springtime crafting. 

Spellbinders Sew Sweet Collection | Page 6
For the back of my mini book I have stamped a sweet sentiment "Bloom where you are planted" and embossed it with Rangers Antiqued Gold powder. 

From beginning to end, this mini book provides springtime appeal for the card maker, gardener, scrapbooker, or lover of all things "Sew Sweet!"  I hope you've enjoyed my creation using the Spellbinders Sew Sweet Collection by Tammy Tutterow.   It's been my pleasure to share it with you.


SWEEPSTAKES:
Spellbinders is currently running a $500 sweepstakes Here This huge giveaway is only available to US residents.

GIVEAWAY:
To celebrate this release, Spellbinders will be giving away a $50 gift certificate to a lucky winner.  Please leave a comment on Spellbinders blog by Sunday, March 18th 11:59 EDT for a chance to win.  The winner will be announced in the blog hop post on Spellbinders blog the following day.  *Winner is responsible for shipping cost, duties and taxes.*

OPTIONAL GIVEAWAY:
In addition, I will draw a winner to receive a $25 gift certificate to Spellbinders.  To be entered, just leave me a comment on this post and I will announce the winner on Sunday, March 18th and provide information to collect the gift certificate at that time.   *Winner will be responsible for shipping cost, duties and taxes.*

The Winner is:
Marcie Lovett
Please contact Spellbinders at the following email address: socialmedia@spellbinders.us  by 3/25/2018 with the subject line Spellbinders March 2018 Blog Hop Winner from Susie's Blog  Please remember the winner is responsible for all shipping costs, shipping, and taxes.

Thank you to everyone for your visit and wonderful comments.

SPELLBINDERS SUPPLIES:


OTHER SUPPLIES:


Patterned paper: Carta Bella; Felt: Papertrey Ink, Taylored Expression; Ribbon, Adhesives, Chipboard, Seed Packet, Photographs by Susie Lessard,

KEEP HOPPING:


Susie Lessard      <----


I'd like to thank Spellbinders for the opportunity to take part in the March 2018 Inspiration/Release Blog Hop, and hope you've enjoyed my sweet offering today.

From my garden gate to yours
Sincerely,
Susie ~

Thursday, March 8, 2018

Simon Says Stamp I Best Days Release I Blooming Circle Die

Hello friends!  Today I'm sharing a new Simon Says Stamp die from the March Best Days release called, Blooming Circle.   Springtime is popping up all over South Carolina!  And just in time to share this sweet floral wreath die that is so easy to design with.

I die cut two circles from white card stock.  One for the wreath, and one for the back.   After punching out the negative flowers, leaves, and little circles (remember to keep them), I flipped it over and adhered the second circle cut from Stick It to the back.   I used the Blooming Wreath die several more times to cut out my springtime flowers in different colors from the Lawn Fawn Watercolor Wishes paper collection.   Those pastels are a perfect way to get the watercolored look.

Placing the flowers back in their designated space was easy.  No messy glue to fiddle with - just a matter of choosing which color I wanted and picking them up with my Marvy Uchida Jewel Picker Tool.  And because I had used Stick It adhesive on the back everything stayed in place.  
The decorative small holes were filled with Stardust Stickles, tiny gems, and some colored negatives from the wreath die.  Because the flower wreath is a little on the whimsy side I decided to give it some "tweet musical notes" and blue birds singing around the center sentiment.  The added dimension and color contrast of the sentiment really provided a nice presence for this small card.

I'm delighted to herald in spring singing a sweet Hello!

Thank you for visiting
Sincerely,
Susie ~


Saturday, February 24, 2018

Spellbinders I Poppies Pocket Card Etched Die + D-Lites Poppy & Lavender

Hello friends!

Happy mail never looked so good!  This past week I received a package from Spellbinders that contained beautiful Etched Dies, Poppies Pocket Card Etched Die S5-322  and Die D-Lites Poppy & Lavender Spray S3-322  These dies are both intricate in their designs, and perfect for springtime card crafting.   Beautiful steel dies really lend themselves to technique driven card crafting.  So let's get started and take a look!

Creating multiple cards to give as gift sets or keep in your card stash is always a value added in my book; when I can achieve that end I'm delighted!   The Spellbinders Poppy Pocket Die allowed me to do just that.   I die-cut two in white card stock and embossed them.  Using a beginner technique, I sponged on color to the raised area of the poppy in Hibiscus Burst and Harvest Gold Dye Inks.   The background patterned paper is from the Penny Black 6x6 paper pad, Beau Jardins, in pink and yellow.  Stamping a sentiment isn't always necessary when creating cards like this.   I used some chipboard ephemera with a short sentiment and strengthened it with Spellbinders Classic Circle die, and trimmed around the circle with a gold leaf pen.  Finally, some flat pearls, little gem stones, and repeated the gold leaf edging on both sides of the card.  Add a matching envelope and you've created a nice stationary set.


The next technique uses a Gel Printing Plate from GelliArts, a brayer, and paints.  Poppies come in all sorts of colors, but most people are more familiar with the red variety.   I spread some red paint on my Gel plate and pushed it around with my brayer until I was satisfied with the coverage.   Lay your card stock on top of the paint and burnish with your hand to lift the paint to the paper.   Then gently lift your paper and you've just created a background print that is different every time!  I let my print dry and then cut it with my Poppies Pocket die.  My background panel is a small floral print that is wet embossed using watermark ink and clear embossing powder on Spring Moss card stock from Papertrey Ink.   A sentiment is stamped in Lipstick Red from Simon Says Stamp on white card stock and cut using Spellbinders Labels Twenty-eight die.  As I did with the first two cards, I sponged on some ink for additional interest.   I also stamped on the matching envelope with an older poppy stamp from my collection and colored with Faber-Castell Polychromos pencils.

My last two cards use the beautiful Die D-Lites Poppy & Lavender Spray Etched Die S3-291   This die is a wonderful addition to your floral die collection and is a combination of both lavender and poppies.  I chose to design the first card using a faux letterpress technique.  One of the best video tutorials I have seen on the technique is from Jennifer McGuire Ink here.   I decided to use Lipstick Red Dye Ink to cover the entire image before I laid it down on watercolor paper and ran it through my die-cutting machine.   You end up with a beautiful faux letter pressed image of the Lavender & Poppy die cut.   I stamped and embossed the background panel using the same older poppy stamp with Watermark Ink and Ultra-fine Antiqued Gold from Simon Says Stamp.   The sentiment is from the Simon Says Stamp set, Choose Joy and embossed with the same Antiqued Gold Ultra-fine powder.  Both the smaller panel and sentiment are raised using dimensional sticky tape.  A few gold sequins finish this classic design.

My last card uses the same beautiful Die D-Lites Lavender and Poppy die     I embossed the spray and now the intricate detail shows through.   I used the same layout as above, but matted the die-cut image on Soft Stone card stock backed by burnished gold and black mat.  The same sentiment is used, but stamped and embossed on black card stock.   I also used Nuvo Crystal Drops in Ebony Black instead of sequins.  The impact of the black and gold is elegant and classic.

Two dies plus techniques that range from beginner to more advanced.  The result?  Five cards any card maker would be happy to give to another.  I'd like to thank Spellbinders Creative Arts for the opportunity to create with their product.   I hope you enjoyed these cards too dear friends.   Now go create something that makes your heart sing!

Sincerely,
Susie ~
Monday, February 19, 2018

Framing Sentiments & Images -- Papertrey Ink Make It Monday

Hi friends!

I had a long weekend in my craft room to just fiddle around.  A little of this, a little of that.  The joy of art for me is the "whole" does that make sense.  I love fiddling, fussy cutting, arranging and re-arranging; finding things I had tucked away for a rainy day.  This weekend I pulled out a coloring book and thumbed through the pages.   Normally I don't color the entire page, instead I cut out the images I want to color  - hmm, what can I make with this?   I fussy cut all the flower pots sitting on a shelf, and the two pots that looked as if they might be sitting on a window ledge.  I colored them with Faber-Castell Polychromos Pencils then laid it all aside to think on it.
 
 This morning on Papertrey Ink Make it Monday, Laurie Schmidlin, shared her ideas and cards for Framing Sentiments & Images   The aha moment!  I thought about our garden center and the pretty outdoor vignettes.  The patterned paper I had chose looked like tile to me so I decided to use that as a "background wall" with potted succulents and spring flowers.   Everything was colored so it was only a matter of putting it together.  I used a pretty square frame from the Papertrey Ink set, Take Note. and framed the larger flower pots.   I stamped the sentiment Counting my blessings from Papertrey Ink stamp set, Gratitude Journal.  This is an older set from 2011 and may be retired now, but I thought it was prefect for this card.    I thought it might be nice to include this card with a potted plant for my neighbor.  She is such a blessing and has been sick with the flu - she needs a dose of kindness (maybe some zucchini bread too).   If I had thought about it before I had finished I would have stitched around the first panel - next time.
This card came together so quickly I had time to fiddle around some more *haha*  I cut out several more images from the page and will color them this week.
Hope your weekend was a restful one.

Sincerely,
Susie ~
Saturday, February 17, 2018

Kindness

Happy Saturday!

One of the quick and easiest ways to create a lovely card is to use patterned papers with coordinating ephemera, a sketch layout of your choice, and before you know it - Voila!   One way to keep these items handy is to subscribe to a monthly card kit.  There is no obligation to purchase every month either (I appreciate that).   And, let's face it, as much as we all like to spend time in our craft rooms, there are times we just want to relax and have fun without an end result in mind.  Monthly card kits can be that quick recipe staple when you need it.


Today I decided to take my own advice.   I took out my Simon Says Stamp November Card Kit, Kind Flowers.  I also used the January 2018 Papertrey Ink Sketch layouts.   Each month Papertrey Ink provides a download of color palettes and sketch layouts that really get that mojo in gear.  Sign up for their newsletter so you don't miss out.   Some simple layering, added dimension, ribbon, and a little sparkle of sequins produced two lovely cards from one kit.  That's value added in my book.  It's a simple recipe that packs a punch!   A perfect springtime duo for any occasion.

Sincerely,
Susie ~

Custom Post Signature

Custom Post  Signature